European aluminum windows don't come with a nailing flange. That's not a limitation - it's a deliberate engineering choice that gives you cleaner exteriors, better placement flexibility, and stronger long-term stability. But it does mean your install crew needs to understand a different method.
This guide covers what bracket mounting is, why it matters, and the key steps for getting it right in U.S. wood-frame and steel-stud construction. It's written for builders and GCs who may be setting European windows for the first time.
For NAFS/NFRC documentation and compliance support, see the related guide.
Why Bracket Mounting?
In European construction - typically masonry or concrete - windows are anchored directly to the structure using brackets. No nailing fin, because there's no wood sheathing to nail into.
When these systems go into U.S. light wood-frame construction, the same bracket method applies. The result:
- Flexible positioning - place the frame anywhere within the wall depth (exterior plane, mid-wall, or interior-aligned)
- Clean exterior - no visible flange behind the cladding
- Precise leveling - controlled shimming process
- Strong load path - brackets transfer directly into the framing
This applies to tilt-turn windows, casements, fixed units, entry doors, lift-and-slide systems, and bi-folds. If a unit has an integrated nailing flange (some European systems offer this for the U.S. market), follow the flanged instructions instead.

The Installation Sequence
1. Verify the Rough Opening
Allow approximately 1/2" to 3/4" clearance per side. Before setting any unit, confirm:
- Sill is level (non-negotiable for doors and sliders)
- Jambs are plumb
- Opening is square (diagonals within 1/8")
Correct framing issues before proceeding. European precision hardware - multi-point locks, European hinges - is sensitive to out-of-square openings.
Also decide the frame depth position within the wall and keep it consistent across the project.
2. Install the Sill Pan
This is the most consequential detail. Bracket-mounted systems rely entirely on rough opening water control - there's no integral flange as a backup.
- Install a continuous sill pan before the frame goes in
- Extend pan up the jambs (minimum 6")
- Ensure positive slope toward the exterior
- Seal all corners and seams
A window installed without a proper sill pan will eventually leak - not because of the window, but because of the detail.
3. Prep the Frame
For tilt-turn windows and swing doors, remove operable sashes before setting - it reduces weight, improves visibility during fastening, and prevents sash damage during shimming. Store sashes on padded supports.
Attach the manufacturer-supplied mounting brackets to the frame perimeter: near each corner, at regular intervals (typically every 24"-30"), and near hinges, locks, and mullions.
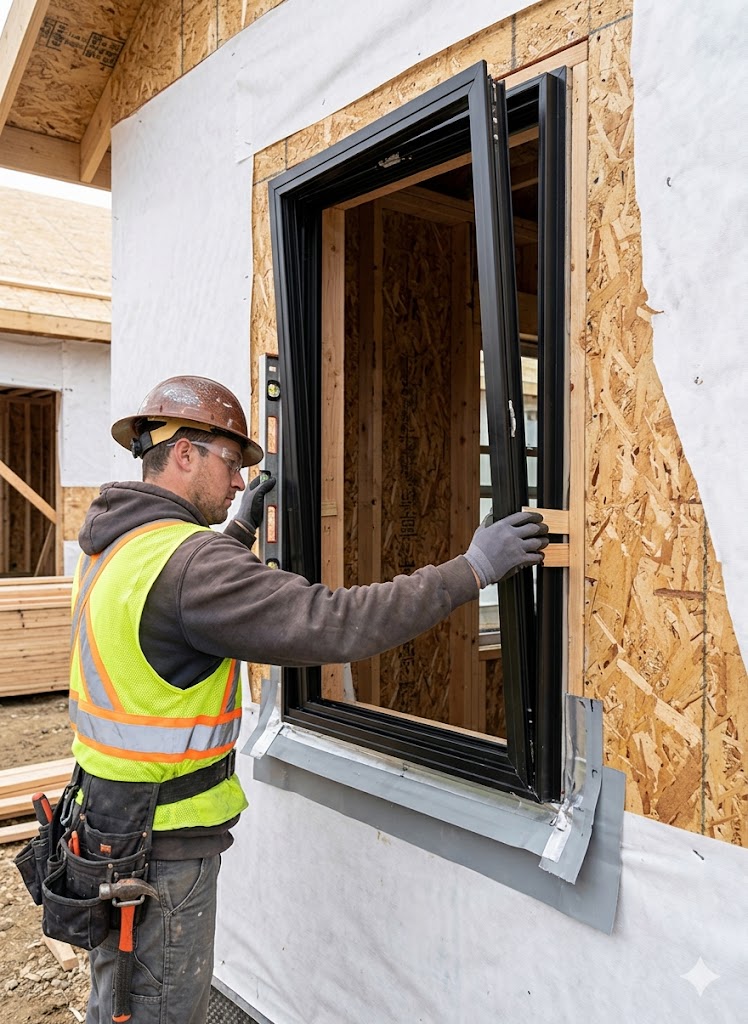
4. Set and Shim
Place the frame on solid, load-bearing support blocks at the sill - under each jamb leg and at intermediate points for wide spans. These blocks are permanent and carry the dead load of the frame and glazing.
Shim to achieve:
- Level at sill and head
- Plumb at both jambs
- Square (diagonals equal)
- No twist or bow
Use opposing paired shims to center the frame without lateral force. Maintain 3/8" to 1/2" insulation gap around the perimeter after shimming.
5. Fasten the Brackets
Secure corner brackets lightly first, then work toward the center. Tighten progressively while checking level and plumb after each fastener.
Do not pull the frame into warped studs. If a stud is twisted, shim behind the bracket to fill the gap before fastening.
6. Insulate the Gap
Use low-expansion window and door foam only - standard high-expansion foam generates enough pressure to bow aluminum profiles. Fill to about 2/3 depth on the first pass, let it partially cure, then add more. For gaps over 3/4", use backer rod first.
7. Seal Exterior and Interior
Exterior (WRB integration):
- Jamb flashing first, lapping over the sill pan
- Head flashing last, lapping over the jambs
- Never tape over sill weep paths or block drainage
Interior (air seal):
- Continuous air-sealing tape or sealant at the frame-to-rough-opening interface
- A perfect window gasket with a broken interior air seal still fails a blower door test
8. Reinstall Sashes and Adjust
Rehang operable sashes. European tilt-turn hardware has 3-axis adjustment (height, lateral, compression) via hex key. Check:
- Smooth tilt and turn operation
- Multi-point lock engagement without forcing
- Uniform gasket compression around the full perimeter
For sliding systems, verify smooth panel travel and that the lift-and-slide mechanism raises and drops the panel evenly.
Doors and Sliding Systems: Extra Notes
- Plan crew size for weight - a 10-foot lift-and-slide panel with triple glazing can exceed 500 lbs
- Door frames need continuous sill support across the threshold, not just point supports at jambs
- Sliding systems require a perfectly level sill - even 1/8" over 10 feet causes drift and uneven gasket compression
- Keep threshold drainage clear - debris in the track is the most common cause of water infiltration at sliders
Common First-Project Mistakes
- Setting the frame before the sill pan is installed
- Not removing sashes before setting large frames
- Using high-expansion foam and bowing the frame
- Skipping the interior air seal
None of these are hard to avoid - they just require understanding the sequence and respecting each step. After the first installation, the process is consistent and repeatable.
If you're preparing for a first European window installation and want project-specific guidance on bracket layouts, threshold details, or WRB integration for your wall assembly, Schedule a Call. I typically provide technical support to the installation teams working on projects I've sourced.
Kai, your window guy!